Deep Water Culture (DWC): Build It, Run It, Harvest It
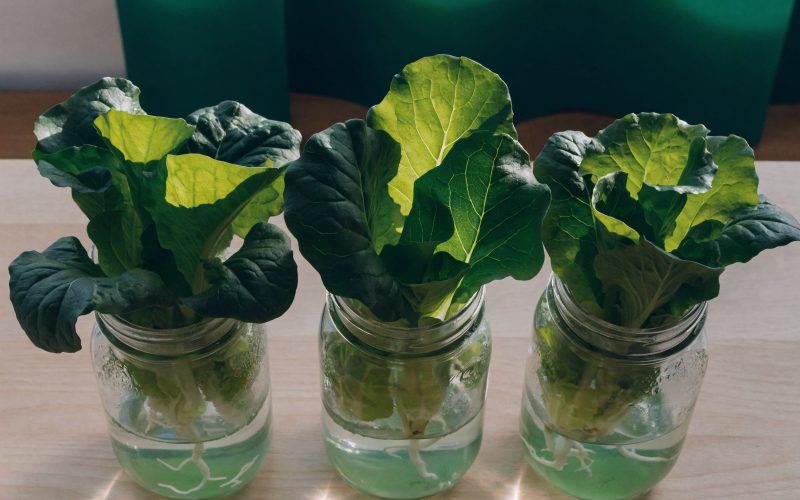
Deep Water Culture is the simplest active hydroponic system. One pump. One air stone. A bucket of nutrient solution. Plants suspend their roots directly in the aerated solution and grow at a rate passive systems cannot match.
If you have already grown in Kratky or understand the basics of nutrient solution management, DWC is the logical next build. The nutrient chemistry is identical. The difference is mechanical: instead of relying on a passive air gap, you pump oxygen directly into the solution 24 hours a day. That single change unlocks higher EC, faster root development, and the ability to grow high-demand crops like tomatoes and peppers without the reservoir management constraints that make passive systems a poor fit for fruiting plants.
This guide covers the mechanism, the parts list, the build, and the operational parameters you need to actually get harvests, not just a working bucket.
What DWC Is (and How It Differs from Passive Systems)
In any hydroponic system, plant roots need two things simultaneously: nutrients dissolved in water and enough oxygen to support aerobic root respiration. The challenge is that these two needs are in natural tension; roots submerged in still water will eventually deplete dissolved oxygen and suffocate, even in perfectly formulated nutrient solution.
The Kratky method solves this by creating an air gap as solution is consumed: roots below the waterline absorb nutrients, roots above it absorb atmospheric oxygen. Elegant, but constrained: the air gap limits how long roots can stay fully submerged and means EC must stay moderate to prevent osmotic stress in a static reservoir.
DWC eliminates the trade-off entirely. An air pump pushes air through flexible tubing to an air stone submerged at the bottom of the reservoir. The air stone diffuses air into thousands of tiny bubbles, which rise through the nutrient solution and dissolve oxygen as they travel to the surface. With a correctly sized pump, dissolved oxygen (DO) levels stay at 7–9 mg/L, well above the 4–5 mg/L minimum threshold for healthy root function and comfortably above the 6 mg/L target for optimal growth.
At 7–9 mg/L DO, roots can stay fully submerged indefinitely. This means:
- Plants can run at higher EC without osmotic stress from oxygen deprivation
- Root mass develops faster because roots do not need to grow upward into an air gap to survive
- Nutrient uptake is continuous and consistent rather than pulsed with the water level drop
- The system can support crops with higher, more variable nutrient demand (tomatoes, peppers, cucumbers)
The growth speed advantage is real and measurable: in controlled comparisons, DWC plants of the same variety and age consistently reach harvest 15–25% faster than Kratky. The mechanism is dissolved oxygen driving faster cellular metabolism in roots, which accelerates nutrient uptake and translates to above-ground growth.
Why Aeration Is Not Optional
This point is worth being direct about: aeration is not a feature you can skip or cheap out on in DWC. Without adequate dissolved oxygen, DWC becomes a system that kills plants faster than passive hydroponics, not slower.
Here is why. In a Kratky system without aeration, roots are partly in air and partly in solution. If the solution goes low-oxygen, the air-gap roots survive and the plant struggles but does not immediately die. In DWC, roots are fully submerged. Low dissolved oxygen in a fully submerged system means pythium (root rot) within 24–48 hours in warm conditions.
Two variables control dissolved oxygen in a DWC reservoir:
Temperature: Oxygen solubility decreases as water temperature rises. At 65°F, water can hold about 8.2 mg/L of dissolved oxygen. At 72°F, that drops to 7.4 mg/L. At 80°F, it falls to 6.6 mg/L, right at the limit for healthy roots. Above 75°F, pythium growth rates increase dramatically. This is why reservoir temperature above 72°F is the #1 cause of root rot in DWC, not contamination, not neglect, not bad nutrients.
Pump output: The air pump must move enough air to keep DO levels above 6 mg/L throughout the reservoir volume. Undersized pumps circulate air near the stone but leave the upper water column poorly oxygenated. Use at minimum 1 watt of pump power per gallon of reservoir volume.
Monitor DO if you have a DO meter; if not, use reservoir temperature as your proxy. If the reservoir is below 70°F and the pump is running, DO is almost certainly adequate.
Parts List: Single-Bucket DWC Build
This is the complete bill of materials for one 5-gallon DWC bucket capable of growing one plant of any type from lettuce to tomatoes. No optional items. Every component on this list serves a specific function.
| Component | Recommended Option | Why / Notes | Approx. Cost |
|---|---|---|---|
| 5-gallon bucket (opaque) | Any hardware store black bucket | Must be opaque; light causes algae | $3–$5 |
| Bucket lid | Standard snap-fit lid for above bucket | Needs to match bucket diameter | $1–$2 |
| Net pot, 3-inch | Hydrofarm or generic | 3-inch fits most bucket lids with a single hole | $0.50–$1 |
| Air pump, 2–4W | Vivosun VS100 or Active Aqua 2W | Size for 5–10 gal; 2W is minimum | $8–$12 |
| Air stone, cylindrical | 4-inch cylindrical diffuser stone | More surface area = finer bubbles = better DO | $2–$4 |
| Airline tubing, 3–4 feet | Standard silicone tubing, 3/16” ID | PVC tubing works but silicone lasts longer | $2–$3 |
| Check valve (anti-siphon) | Inline check valve for airline tubing | Prevents siphon-back if pump fails/turns off | $1–$2 |
| Clay pebbles (hydroton) | Hydroton original or generic | Rinse thoroughly before use | $8–$12 per liter |
| Base nutrients | General Hydroponics FloraSeries (3-part) or MaxiGro | FloraSeries gives precise 3-stage control | $15–$25 |
| pH meter | Apera PH20 or Bluelab pH Pen | Digital is more reliable than drops for DWC | $25–$35 |
| pH Up / pH Down | GH pH Up and pH Down | Buy both. You will need both | $8–$12 |
| EC / TDS meter | Apera EC20 or generic TDS pen | EC pen preferred over TDS (EC is the actual measurement) | $15–$20 |
| Thermometer | Waterproof digital probe thermometer | Reservoir temperature monitoring is critical | $8–$12 |
Total estimated build cost: $96–$143 for a first build with all meters. If you already own a pH meter, EC meter, and thermometer from a Kratky build, the per-bucket hardware cost drops to $25–$50.
The check valve deserves extra emphasis. If your pump fails overnight and the air stone outlet is below the water line, nutrient solution will siphon back through the tubing and potentially damage the pump or flood the surface. A $1 inline check valve prevents this.
Step-by-Step: Building Your First DWC Bucket
Step 1: Prepare the Bucket
Cut a 3-inch hole in the center of the bucket lid using a hole saw or sharp utility knife. The net pot should sit flush in this hole, basket below, rim resting on the lid edge. Test fit before adding water.
Mark the reservoir level on the outside of the bucket at two heights: the fill line (about 1 inch below the bottom of the net pot) and the refill threshold (about 3 inches below fill line). You will top off when the level drops to the refill threshold.
In DWC, roots grow downward into the reservoir rather than staying at the waterline like Kratky. After the first 7–10 days, roots will reach the solution surface even if the net pot bottom is not touching it. Initially, the solution should be close enough to the net pot bottom that roots can reach it: a 0.5 to 1 inch gap is ideal for the first week.
Step 2: Set Up the Aeration
Route the airline tubing from the pump, through the check valve (arrow pointing away from pump, toward stone), and down into the bucket. The air stone should sit on the bottom of the bucket or be positioned in the lower third of the solution column. Secure it there with a small weight or suction cup clip if it tries to float.
Plug in the pump and confirm bubbles are rising through the full water column. The surface of the solution should have a gentle turbulence across its full area, not just above the stone.
The pump runs 24/7 in DWC. Do not put it on a timer. Roots that are fully submerged need continuous oxygenation. A timer introduces DO dips at every off cycle.
Step 3: Mix and Test Your Nutrient Solution
Fill the bucket with water, leaving enough headspace to not overflow when you add nutrients. Let the pump run for 5 minutes to aerate the water before measuring pH; aeration drives off dissolved CO2, which can affect pH readings.
Measure your starting water EC. Tap water typically reads 0.2–0.5 mS/cm. If above 0.5 mS/cm, consider using a filtered or RO water base for more precise control.
Add nutrients according to label directions to reach your target starting EC. For transplants and seedlings, target 0.8–1.2 mS/cm. For established plants in active growth, target crop-specific EC (see crop guide below).
For mixing your nutrient solution correctly with a 3-part system, the General Hydroponics FloraSeries ratio for vegetative DWC is: 5 mL/gal FloraGro + 5 mL/gal FloraBloom + 5 mL/gal FloraMicro, in that addition order, in plain water. Always add FloraMicro first to prevent calcium-phosphate precipitation.
Adjust pH to 5.8–6.2. In DWC, a target of 5.9–6.0 is slightly preferable to 6.2 because the continuous aeration keeps oxygen stable enough that you do not need to buffer upward for oxygen reasons. Test pH after the solution has been circulating for at least 10 minutes.
Record the starting EC, pH, and water temperature. This is your baseline for the day-1 check.
Step 4: Transplant
If starting from a seedling in a rockwool cube or soil plug: rinse the root zone gently to remove any growing medium debris. Place the root plug in the net pot with the root side down. Surround with rinsed clay pebbles to hold it upright. The roots should point downward into the bucket interior.
If the seedling roots are not yet long enough to reach the solution at the fill line, mist the clay pebbles with plain pH-adjusted water for the first 2–3 days until roots extend into the solution. Alternatively, raise the solution level temporarily to touch the bottom of the net pot, then lower it after roots have established.
If starting from seed: germinate in a rockwool cube pre-soaked in pH 5.5 water, maintain humidity until the seed sprouts, and transplant to DWC once the taproot is 1–2 cm long. This typically takes 5–7 days from sowing.
Step 5: Set Up the Environment
DWC manages the root zone through solution management; the canopy environment is handled through lighting and airflow. For reference values, the VPD chart guide gives target vapor pressure deficit ranges by growth stage, and keeping VPD in range reduces transpiration stress that can cause EC drift in the reservoir.
Provide 14–16 hours of light per day for leafy greens; 16–18 hours for fruiting crops in vegetative stage; 12 hours for fruiting crops in flower. Reservoir temperature is your primary environmental target; keep it at 65–70°F. Use an aquarium chiller if ambient temperature makes this difficult, or insulate the bucket with foam and freeze water bottles to swap out during peak heat.
Managing EC and pH in DWC
DWC requires more frequent monitoring than Kratky. The mechanism is straightforward: because the solution is fully oxygenated, plants uptake nutrients actively and continuously. This drives faster depletion and faster drift in both EC and pH.
Monitoring schedule:
- EC and pH: check every 1–2 days. For fruiting crops in peak growth, check daily.
- Reservoir temperature: check daily (a digital probe thermometer left in the reservoir makes this passive).
- Reservoir level: check every 2–3 days; top off when level drops to refill threshold.
What happens when you only check every 3–4 days (like Kratky):
If the plant is uptaking water faster than nutrients (typical in vegetative stage), EC will rise as the solution concentrates. If EC rises more than 0.5 mS/cm above target, top off with plain pH-adjusted water to dilute back to target. If EC falls (nutrients consumed faster than water), add a small amount of nutrient concentrate to bring it back to target.
pH drift in DWC typically runs downward. Active root metabolism and nitrification of ammonia-based nitrogen both acidify the solution. Expect to add pH Up (potassium hydroxide or potassium silicate solution) every 1–3 days during peak growth.
When to do a full reservoir change:
Change the entire reservoir every 7–14 days. The practical signal: when pH is crashing faster than usual, or when EC reads unexpectedly high after multiple top-offs with plain water. Salt accumulation from incomplete nutrient uptake causes EC to creep up even when you are topping off correctly. A full change resets the baseline.
After a reservoir change: rinse the bucket with plain water, check for any root debris or biofilm on bucket walls (wipe clean with a dilute hydrogen peroxide solution if present), refill with fresh nutrient solution at your target EC and pH.
What to Grow in DWC: Crop-Specific EC Targets
DWC supports a wider range of crops than Kratky because continuous aeration decouples oxygen supply from nutrient concentration. You can run EC levels that would stress roots in a passive system.
| Crop | Veg EC (mS/cm) | Flower/Fruit EC (mS/cm) | pH Target | Days to Harvest |
|---|---|---|---|---|
| Lettuce (butterhead) | 1.4–2.0 | N/A | 5.8–6.2 | 28–35 |
| Basil | 1.6–2.2 | N/A | 5.8–6.2 | 30–40 |
| Spinach | 1.4–2.0 | N/A | 6.0–7.0 | 35–45 |
| Cherry tomatoes | 2.0–2.5 | 2.5–3.5 | 5.8–6.3 | 60–90 |
| Bell peppers | 2.0–2.5 | 3.0–3.5 | 5.8–6.3 | 70–90 |
| Cucumbers | 1.8–2.4 | 2.2–2.8 | 5.8–6.0 | 45–60 |
| Herbs (mint, cilantro) | 1.4–2.0 | N/A | 5.8–6.4 | 25–35 |
| Kale | 2.0–2.5 | N/A | 5.8–6.2 | 45–60 |
A few notes on the table:
Lettuce tip burn (brown edges on inner leaves) is the most common issue at EC above 2.2 mS/cm. It is a calcium transport issue, not a concentration toxicity. Calcium moves through the plant via transpiration, and dense inner leaves on fast-growing lettuce do not transpire enough to pull calcium in. Keep EC at or below 2.0 mS/cm and ensure airflow across the canopy.
Tomatoes and peppers need a calcium-magnesium supplement in DWC because the high water uptake rate demands more Ca and Mg than standard 3-part nutrients provide. Add CalMag at 1–2 mL/gal in addition to your base nutrients, mixed first before adding NPK concentrate.
Basil in DWC is fast. You can go from transplant to a full, harvestable plant in 25–30 days. Prune to the first node set above each pair of leaves when the plant reaches 8–10 inches to encourage bushing rather than bolting.
Upgrading to Multi-Bucket RDWC
Recirculating Deep Water Culture (RDWC) links multiple DWC buckets through a central reservoir via PVC or flexible tubing manifold. The pump circulates nutrient solution from the central reservoir through each grow bucket and back, meaning all buckets share the same nutrient chemistry. You adjust EC and pH once in the main reservoir and the change propagates to every plant site.
The practical advantage: managing EC and pH for 8 or 16 plants takes the same monitoring time as managing a single bucket, because all buckets are on the same solution. The system is also more resilient to individual plant variations; a fast-growing plant drawing down EC quickly is buffered by the larger total solution volume.
Basic RDWC manifold design:
- 1 central reservoir (27-gallon Rubbermaid tote or purpose-built RDWC controller)
- 1 submersible recirculating pump (rated for the total volume + 10–20% head pressure for tubing)
- Supply line from reservoir pump to each bucket (3/4-inch ID tubing runs fine for up to 8 buckets)
- Drain line from each bucket back to reservoir (gravity return, so keep buckets slightly elevated or use a pump return system)
- Aeration: one air pump per bucket, or a single large pump manifolded to multiple air stones
Each individual grow bucket in RDWC is identical to a standalone DWC bucket, except the reservoir maintenance is centralized. Individual bucket aeration still needs to be sized per-bucket.
If you want to build an RDWC system, the best hydroponic system for beginners guide includes a comparison of system types at different scales to help you determine whether RDWC or NFT makes more sense for your space and crop mix before you spend on materials.
Common DWC Problems and How to Fix Them
Root Rot (Pythium)
Symptoms: Roots turn brown and slimy; healthy roots are white or cream-colored with a slight tan where exposed to light. Severely affected roots have a musty smell. The plant may show wilting despite adequate solution, because rotted roots cannot transport water efficiently.
Cause: Almost always reservoir temperature above 72°F. Pythium is an anaerobic pathogen that thrives in warm, low-oxygen conditions. Secondary causes: undersized air pump leaving DO below 5 mg/L, or pump failure.
Fix: Immediately lower reservoir temperature below 68°F. Add beneficial bacteria (Hydroguard at 2 mL/gal or similar Bacillus-based inoculant) to suppress pathogen growth. Remove visibly infected root mass by cutting with sterile scissors. If the problem is severe, replace the entire reservoir and sanitize the bucket with dilute bleach (1 tablespoon per gallon) followed by a thorough plain water rinse before refilling.
Prevention: Keep reservoir at 65–68°F at all times. Insulate the bucket from ambient heat. Run the pump 24/7 without timers.
pH Swings
Symptoms: pH drops rapidly after adjustment, often falling 0.5–1.0 units overnight. Plants may show interveinal chlorosis (yellowing between leaf veins, which indicates iron or manganese lockout from incorrect pH).
Cause: Most common cause is large root mass consuming solution and producing organic acids. Secondary cause: using tap water with high alkalinity, which buffers against pH adjustments.
Fix: If pH is crashing daily, do a full reservoir change; salt accumulation from long-running solution accelerates pH instability. After a fresh fill, pH should stay stable for 2–3 days with normal top-offs. If you are using tap water with high alkalinity (above 200 ppm CaCO3), switch to RO or filtered water.
Pump Failure
Symptoms: Gurgling stops; air stone is not producing bubbles; roots show early-stage browning within 12–24 hours of pump failure.
Prevention: Keep a spare pump on the shelf. They are inexpensive ($8–$12) and last 12–18 months of continuous use before reliability decreases. Check airline tubing for kinks monthly; kinked tubing reduces airflow without stopping the pump.
Fix: Replace the pump immediately. Roots can recover from short-term low-DO exposure if temperature was below 70°F. If roots show sliminess after a pump failure, treat with Hydroguard before continuing.
Algae Bloom
Symptoms: Green or brown coating on bucket walls, tubing, and air stone. Solution may turn green. Algae consume dissolved oxygen and compete with roots.
Cause: Light reaching the nutrient solution, through the bucket walls (if using translucent buckets), around the lid edges, or through the net pot.
Fix: Wrap all light-exposed surfaces with black plastic or aluminum tape. Replace the solution and scrub the bucket interior. Use only opaque containers, not translucent totes or uncovered mason jars.
Nutrient Deficiencies
Symptoms: Various: yellowing starting at older leaves (nitrogen), yellowing between veins with green leaf margins (iron/manganese from wrong pH), brown leaf margins (calcium). These symptoms can look identical to soil deficiency symptoms.
Fix protocol: Check pH first. Most visual deficiency symptoms in DWC are caused by pH outside the 5.8–6.2 range preventing uptake, not by actual nutrient absence. If pH is correct, check EC, and if it is below target, the nutrient concentration may simply be too low for the growth stage. Adjust pH, wait 24 hours, then re-evaluate before adding additional nutrients.
DWC vs. Kratky: A Direct Comparison
If you are deciding between DWC and Kratky for a specific situation, this table covers the meaningful differences:
| Factor | DWC | Kratky |
|---|---|---|
| Equipment cost | $25–$50 per bucket | $10–$20 per container |
| Ongoing power use | 2–4W per bucket (pump) | 0W (no pump) |
| Monitoring frequency | Every 1–2 days | Every 3–4 days |
| Growth speed | 15–25% faster | Baseline |
| Max EC range | Up to 3.5 mS/cm (fruiting crops) | Typically capped at 2.5 mS/cm |
| Suitable crops | All crops including fruiting | Best for leafy greens and herbs |
| Primary failure mode | Root rot from high temperature | Flooding air gap; topping off too high |
| Recovery from neglect | Low tolerance (pump failure = root death within 24h) | Moderate tolerance |
| Scalability | RDWC scales to 100+ sites | Limited by reservoir management complexity |
| Complexity | Low-moderate | Low |
The practical decision rule: if you want to grow lettuce, herbs, and fast-cycling leafy greens with minimal equipment and monitoring, Kratky is the right system. If you want to grow fruiting crops, need faster harvests, or are building toward a multi-plant system, DWC is the correct starting point.
DWC does not replace understanding why Kratky works; the air gap principle and the dissolved oxygen dynamic are the same in both systems. DWC just ensures oxygen availability mechanically rather than geometrically. If you have not yet built a Kratky system, the Kratky method guide is worth reading first, because the nutrient management and pH fundamentals are identical and less forgiving of mistakes in DWC.
Getting Started
A single 5-gallon DWC bucket is enough to evaluate whether DWC works for your setup and growing goals. The hardware commitment is low. The operational learning curve, checking EC, pH, and temperature every 1–2 days, is the part that separates growers who get consistent harvests from those who cycle through root rot and starts.
The beginner hydroponic system guide can help confirm DWC is the right system type before you buy parts. Once you have your components, mixing your nutrient solution correctly from the start prevents the most common first-grow problems.
Build the single bucket. Run one full crop cycle. The growth rate relative to what you have seen in soil or passive systems will make the monitoring routine feel worth it.
[ FAQ ]
How does DWC differ from the Kratky method?
Kratky is passive: the air gap that forms as plants consume solution provides oxygen to roots. No pump, no power (beyond a light). DWC actively pumps air through a stone submerged in the reservoir, dissolving oxygen continuously into the solution. This means DWC roots stay fully submerged without oxygen deprivation, which supports higher EC and faster growth. The trade-off: you depend on the pump not failing, and you need to check EC and pH every 1–2 days rather than every 3–4. DWC is the natural upgrade once you are comfortable with Kratky nutrient management.
What size air pump do I need for DWC?
For a single 5-gallon bucket: a 2–4 watt pump rated for 1–3 gallons/hour is sufficient. Common options: Vivosun VS100 (2W, ~$8) or Active Aqua 2W (~$10). For a 10-gallon reservoir or multi-plant system, scale to 4–6 watts. The rule of thumb is 1 watt per gallon of reservoir volume. Under-powered pumps are the second most common cause of root problems (after high reservoir temperature); dissolved oxygen (DO) should stay above 6 mg/L, which requires adequate air volume, not just any air stone running.
How often should I change the nutrient solution in DWC?
Every 7–14 days as a standard practice, or whenever EC drifts more than 0.5 mS/cm above or below your target after topping off. In practice: check reservoir level daily, top off with plain pH-adjusted water when level drops (plants consume water faster than nutrients at most EC targets). Do a full reservoir change when TDS/EC creeps up after multiple top-offs: this indicates nutrient salt accumulation. For lettuce at 28–35 day cycles, one or two reservoir changes per crop cycle is typical. For tomatoes and peppers at 90+ day cycles, plan on a full change every 2 weeks.
What EC should I use for DWC lettuce?
Start seedlings at 0.8–1.2 mS/cm, then raise to 1.4–2.0 mS/cm once the plant has 4–6 true leaves. DWC can support slightly higher EC than Kratky because the continuous aeration prevents nutrient lockout from oxygen depletion. Running above 2.2 mS/cm with lettuce tends to cause tip burn on outer leaves, a sign of calcium/magnesium transport issues under high EC, not nitrogen toxicity. Keep reservoir temperature at 65–68°F to maximize dissolved oxygen and avoid accelerating nutrient uptake past what the plant can use.
Can I grow tomatoes in a single bucket DWC system?
Yes, with a 5-gallon bucket per plant and a properly sized pump. Indeterminate tomatoes (like cherry tomatoes) will need significant structural support. The plant can reach 5–6 feet indoors under strong LED. EC targets for tomatoes in DWC: 2.0–2.5 mS/cm in vegetative stage, 2.5–3.5 mS/cm in flowering and fruiting. Reservoir checks should happen daily during peak fruit set. Root mass will be substantial. Expect to see white roots densely filling the bucket by week 6. At that point, root pruning is not recommended; instead, plan a reservoir change that disturbs roots minimally.
Related Articles
The Kratky Method: How Passive Hydroponics Actually Works
Learn how the Kratky method works, what you need to build one for under $20, and why it is the best first hydroponic system for beginners.