The Best Hydroponic System for Beginners (2026 Guide)
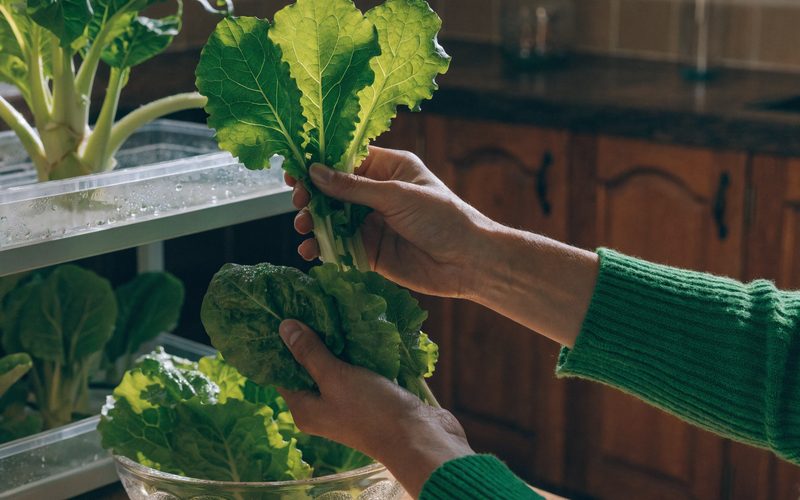
I built my first hydroponic system in a 400-square-foot Brooklyn apartment in 2021. I had exactly one shelf free near a window, no outdoor space, and a background in software rather than agriculture. What I did not have was any clear guidance on which system to start with.
The internet offered two unhelpful extremes: hobbyist forums insisting that Kratky was “basically cheating” because it required so little skill, and YouTube channels pushing $300 NFT setups on people who had never grown anything hydroponically before. I built a DWC bucket, killed my first crop with root rot, rebuilt a Kratky setup, and grew lettuce successfully on the second try.
That experience is why this guide exists. The system you start with determines whether your first grow succeeds. Most beginners do not fail because hydroponics is hard; they fail because they started with a system that has failure modes they did not understand and could not troubleshoot.
This guide compares all five systems you will encounter, gives you a decision matrix, and makes a specific recommendation for where to start and when to upgrade.
Why System Choice Matters More Than Technique
Every hydroponic system solves the same fundamental problem: getting water, nutrients, and oxygen to plant roots simultaneously and consistently. The systems differ in how they solve it, and those differences matter enormously for beginners.
The three variables that make a system beginner-appropriate are: how many things can go wrong, how quickly failure kills the crop, and how much intervention is required to prevent failure. A system with few failure modes, slow failure progression, and low daily intervention requirements is right for a first grow. A system with multiple interdependent failure modes, fast failure progression, and high daily monitoring requirements is right for an experienced grower who knows what warning signs to watch.
There is also a cost dimension. Some systems require pumps, timers, and precision equipment that add $50–150 to the build cost. Others need nothing more than a container, a lid, and some nutrient solution. Getting those costs wrong before you understand whether you will stick with the hobby is a real barrier.
The decision is not about which system is technically best. It is about which system sets you up to succeed on the first grow, learn the fundamentals of nutrient and pH management, and make an informed choice about what to build next.
The Five Systems You Will Encounter
Kratky (Passive, No Pump)
The Kratky method suspends plant roots in a static reservoir of nutrient solution. Plants draw down the solution as they grow, and an air gap forms above the waterline. Roots below the waterline absorb nutrients; roots in the air gap absorb atmospheric oxygen. No pump, no electricity beyond a grow light, no moving parts. The system is self-regulating by design. A correctly set up Kratky container for lettuce requires checking pH and reservoir level every 3–4 days and almost nothing else.
Deep Water Culture / DWC (Air Pump, Continuous Oxygenation)
DWC also uses a static reservoir, but adds an air pump and air stone to dissolve oxygen continuously into the nutrient solution. This keeps dissolved oxygen at 7–9 mg/L rather than relying on a passive air gap, which means roots can stay fully submerged and run at higher nutrient concentrations. The result is 15–25% faster growth than Kratky for the same variety. The trade-off: a pump running 24/7, daily to every-other-day monitoring of EC and pH, and a failure mode (root rot from pump failure or high reservoir temperature) that can kill a crop within 24 hours in warm conditions.
NFT: Nutrient Film Technique (Thin Recirculating Film)
NFT channels pump a thin, continuous film of nutrient solution through a sloped grow channel. Plant roots sit in the channel, with the lower roots touching the film and the upper roots in the humid air above it. No growing medium is required; roots support themselves. NFT is efficient and scalable, and it is the system used in many commercial lettuce operations. For beginners, the critical problem is that the thin film provides almost no buffer: pump failure dries roots within 15–30 minutes and kills the crop within hours. There is also no growing medium to buffer pH swings, so the solution concentration changes quickly as plants uptake nutrients.
Ebb and Flow / Flood and Drain (Periodic Flooding)
Ebb-and-flow systems flood a grow table or tray with nutrient solution on a timer, then drain it back to a reservoir. Plants sit in growing medium that absorbs the nutrient solution during flooding and holds some moisture between cycles. This system supports a wide variety of crops and can handle large plants easily. For beginners, the failure modes are subtle: the timer must be calibrated precisely to prevent root drying (too infrequent flooding) or root rot (too frequent flooding without proper drainage). Getting the flood schedule right depends on the growing medium, plant size, and ambient temperature, all variables that interact in non-obvious ways.
Wick System (Cotton Wick, Truly Passive)
Wick systems draw nutrient solution up through absorbent wicks (cotton, nylon rope, or felt strips) from a reservoir into a container of growing medium. No pump, no electricity, completely passive, and even simpler than Kratky in terms of mechanical components. The limitation is throughput: wicks cannot deliver nutrients and water fast enough to support plants with moderate to high growth rates. Wick systems work for small herbs in low-light conditions. They do not support lettuce at productive growth rates, cannot support fruiting plants at all, and are so limited that they do not teach the nutrient management skills that transfer to real hydroponic systems.
The Decision Matrix
Here is a direct comparison of all five systems across the factors that matter most for a first grow:
| System | Cost to Start | Power Required | Crops Supported | Maintenance | Failure Risk | Beginner Score |
|---|---|---|---|---|---|---|
| Kratky | $30–$60 | Light only | Leafy greens, herbs | Low (every 3–4 days) | Low | ★★★★★ |
| DWC | $50–$100 | Light + pump | All crops | Medium (every 1–2 days) | Medium | ★★★★☆ |
| NFT | $80–$150 | Light + pump + timer | Leafy greens at scale | High (daily) | High | ★★☆☆☆ |
| Ebb and Flow | $100–$200 | Light + pump + timer | Wide range | High (calibration-heavy) | Medium-High | ★★☆☆☆ |
| Wick | $15–$30 | Light only | Small herbs only | Low | Low | ★★☆☆☆ |
The beginner score weights three things equally: how likely a correctly-built system is to produce a successful first crop, how quickly the grower builds transferable skills, and how recoverable mistakes are before they kill the crop. Kratky scores highest because all three are favorable. DWC scores well because the skills transfer directly and the failure mode is understandable with basic monitoring. NFT, ebb-and-flow, and wick each have disqualifying characteristics for a first system.
For Most Beginners: Start With Kratky
If you have never grown hydroponically before, build a Kratky system first. This is not a hedge; it is the specific recommendation based on what makes first grows succeed.
Here is the reasoning. Kratky has exactly one failure mode that matters: eliminating the air gap by topping off the reservoir too high. That failure mode is slow (it takes days of submerged roots to cause problems), visible (roots turn brown before the plant shows above-ground symptoms), and documented clearly enough that you can look it up and fix it. Every other failure mode (pH drift, slow nutrient depletion, algae) is also slow and fixable.
Compare this to DWC, where pump failure can kill a crop in warm conditions within 24 hours, and you understand why Kratky is the right starting point for someone who is not yet monitoring their system daily.
Kratky also requires no pump, which means no pump noise, no electricity cost beyond a grow light, no timer, and no risk of losing a crop to an electrical or mechanical fault. In an apartment or shared living space, this matters.
What a Kratky first grow looks like:
Set up costs $50–80 for a complete first build. You transplant a seedling into a net pot above a reservoir of mixed nutrient solution. You check pH and solution level every 3–4 days. In 28–35 days, you harvest lettuce or basil. On that first grow, you learn: what healthy roots look like, how pH drifts and how to adjust it, how to read the solution level to know when the plant is drinking, and what a plant that is happy in hydroponics looks like versus one that is stressed. These skills transfer directly to every other system type.
First-grow timeline for lettuce in Kratky:
- Days 1–7: Transplant seedling; roots establish in solution
- Days 7–14: Roots reach below waterline; plant begins active vegetative growth
- Days 14–21: Air gap forms as solution level drops; plant grows visibly day-over-day
- Days 21–28: Plant is at full-head size for loose-leaf varieties; begin harvesting outer leaves
- Days 28–35: Full harvest of butterhead or romaine varieties
The two checks you actually need: pH (target 5.8–6.2) and reservoir level (do not top off unless the plant is struggling and the level has dropped more than two-thirds). That is it.
For the Builder Who Wants More: Start With DWC
If you have already grown in Kratky, understand how to manage pH and EC, and want faster growth and the ability to grow fruiting crops, DWC is the right next build. If you are starting from zero and know you want to grow hydroponic tomatoes or peppers eventually, DWC is also a reasonable first system, with the caveat that you need to monitor it more carefully.
What DWC adds over Kratky: an air pump ($8–15), an air stone ($2–4), airline tubing ($2–3), a check valve ($1–2), and an electricity connection for the pump (2–4 watts, continuous). What that buys you: dissolved oxygen held at 7–9 mg/L continuously, which lets you run higher EC targets, grow plants with higher nutrient demand, and harvest 15–25% faster than a comparable Kratky setup.
The nutrient management in DWC is identical to Kratky: same pH targets (5.8–6.2), same nutrient chemistry, same EC ranges for leafy crops. The difference is monitoring frequency. Because plants in DWC uptake nutrients more actively, EC and pH drift faster. You need to check both every 1–2 days rather than every 3–4. For lettuce, that means an extra two or three checks per grow cycle. For tomatoes in peak fruiting, it means daily checks during the weeks of heaviest growth.
The other variable DWC introduces is reservoir temperature. Dissolved oxygen decreases as water temperature rises, and above 72°F the pythium (root rot) pathogen grows rapidly. This is the primary DWC failure mode, not a complex one, but one that requires awareness. Keep your reservoir below 70°F: insulate the bucket with foam, avoid placing it in direct sunlight, and monitor temperature the same way you monitor pH.
If you want a detailed build guide for DWC, the Deep Water Culture guide covers the parts list, step-by-step build, and crop-specific EC targets.
What NOT to Start With
NFT and ebb-and-flow are both well-established systems that work well at scale; they are used in commercial greenhouses worldwide. They are not appropriate for beginners, and the reason is specific: their failure modes are fast and not forgiving.
NFT: pump failure is a 15-minute crisis. In an NFT system, the only moisture reaching plant roots is the thin film of solution flowing through the channel. If the pump fails, or if a timer is set to shut the pump off overnight and someone forgets to account for that, roots begin drying within minutes. In warm conditions, a lettuce crop in an NFT channel can be dead within four to six hours of pump failure. For an experienced grower with a spare pump on the shelf and a phone alert from a water flow sensor, this is manageable. For a first-time grower who does not yet know what a dying plant looks like, it is not.
Ebb-and-flow: the flood schedule is more complex than it appears. Getting ebb-and-flow right requires calibrating flood frequency and duration to your specific combination of growing medium, plant size, ambient temperature, and humidity. Clay pebbles drain fast and need more frequent flooding. Rockwool holds water longer. A young plant needs less frequent flooding than a mature one. These interactions are not hard to understand, but they are not obvious either, and a wrong flood schedule (either too dry or too wet between cycles) causes root problems that look similar to nutrient deficiencies, making the cause difficult to diagnose for a first-time grower.
Wick systems: too limited to be worth starting with. The throughput limitation of passive wicking means you will hit the ceiling of what wick systems can support before you finish your first grow season. You will learn almost nothing transferable to other system types, and you will not be able to grow most of the crops worth growing. If you want simple and truly passive, Kratky does everything a wick system does and more; there is no reason to choose a wick system over Kratky.
If you want to start even simpler before committing to a full hydroponic build, the microgreens for beginners guide covers growing microgreens in soil trays, a 7–14 day crop cycle that teaches you what seedling health looks like before you build a reservoir system.
Your First-Grow Shopping List
This is the complete shopping list for a beginner Kratky setup capable of growing four to six plants of lettuce or basil. All items are available from Amazon or a local hardware store.
| Item | What to Buy | Approximate Cost |
|---|---|---|
| Container | 10-gallon opaque Rubbermaid tote with lid | $8–$12 |
| Net pots | 2-inch net pots (pack of 10) | $3–$5 |
| Growing medium | Hydroton clay pebbles (1 liter) | $8–$12 |
| Base nutrients | General Hydroponics FloraSeries (3-part, quart sizes) | $20–$25 |
| pH meter | Apera PH20 or Bluelab pH Pen (digital) | $25–$35 |
| pH Up / pH Down | General Hydroponics pH Up and pH Down | $8–$12 |
| Grow light | T5 LED bar, 24-inch (2,000–4,000 lux) | $20–$35 |
| Seedlings | Lettuce or basil seedlings from a nursery | $3–$5 |
Total for a first build: $95–$141. If you already have a grow light, the cost drops to $75–$106. If you can germinate from seed (rockwool cubes: $5 for 50), eliminate the seedling cost.
The single item not to cheap out on is the pH meter. pH strips and color drops work, but digital meters give you faster feedback and are accurate to 0.1 pH units. At 5.8–6.2, a 0.3-unit error in reading direction (which is plausible with color drops) means you could be running the system at 5.5 or 6.5 without knowing it, both of which lock out significant portions of the nutrient spectrum. A $25 digital meter pays for itself on the first grow by preventing the most common beginner failure mode.
For a detailed walkthrough of mixing your first reservoir, the nutrient solution mixing guide covers EC targets, addition order for 3-part nutrients, and how to adjust pH after mixing.
The IoT Layer: Which Systems Work Best With Sensors
One of the reasons Kratky and DWC are the right starting systems for tech-curious growers is that they are the easiest to instrument. Both systems have a static reservoir that holds stable conditions: pH, EC, water temperature, and reservoir level all change slowly enough that a sensor reading every 5–15 minutes captures the full picture without requiring real-time intervention.
NFT and ebb-and-flow present harder sensor problems: flow sensors on NFT channels can clog or give false readings, and ebb-and-flow flood timing involves multiple sensor states (reservoir level before flood, drain confirmation, tray moisture between floods) that require more complex logic.
For a Kratky or DWC setup, the basic IoT sensor stack is:
- Reservoir level: float sensor or ultrasonic distance sensor in the reservoir lid
- pH: analog or digital pH probe (Atlas Scientific EZO-pH is the reliable choice)
- EC: Atlas Scientific EZO-EC probe alongside the pH probe
- Reservoir temperature: waterproof DS18B20 probe
An ESP32 with these four sensors connected can log to a time-series database, send alerts when pH drifts outside your target range, and give you a dashboard showing reservoir level trending toward empty. The ESP32 moisture sensor guide covers the sensor connection and firmware pattern; the same wiring approach applies to reservoir sensors with the appropriate probe substitution.
This is the build I made after my third Kratky grow: a Rubbermaid tote with a pH probe, an EC probe, a temperature probe, a float sensor, and an ESP32 logging every 10 minutes to a Raspberry Pi running InfluxDB and Grafana. Total sensor hardware cost: about $45. It turned checking pH from a manual chore into a passive data stream.
What to Grow First
The single best first crop for any hydroponic system is lettuce. This is not an exciting answer, but it is the right one.
Lettuce completes a full growth cycle in 28–35 days. That means you get actionable feedback on whether your system is working within a month, rather than waiting 90 days to find out that your tomato plant had a nutrient deficiency at week three. Lettuce tolerates minor pH variation (it stays healthy anywhere from 5.5 to 6.5, though it grows best at 5.8–6.2). It has low EC requirements (1.2–2.0 mS/cm), which means nutrient concentration errors are less immediately damaging. It gives you clear visual feedback: a healthy lettuce plant is bright green, growing visibly day over day; a struggling one is pale, slow, or showing tip burn that tells you exactly what to adjust.
Basil is an equally good first crop and arguably more satisfying if you cook. It grows at roughly the same rate as lettuce (30–40 days to usable size), has similar pH and EC requirements, and responds visibly to pruning, which teaches you canopy management skills that matter when you eventually move to fruiting plants.
Spinach and herbs like cilantro and mint are also good choices. They have slightly lower light requirements than lettuce and are tolerant of beginner-level pH variation.
Crops to avoid on your first grow:
Tomatoes and peppers are the most common mistake. They require 90+ days, higher EC targets (2.5–3.5 mS/cm for fruiting), structural support, and consistent management throughout a much longer cycle. They are also more sensitive to calcium and magnesium deficiencies, which are the kind of deficiency that is easy to miss in the first two weeks and causes irreversible problems by week six. Grow three successful cycles of lettuce first. By then you will understand your system’s behavior well enough to manage the higher demands of fruiting crops.
Cucumbers are similarly demanding: fast-growing, high water uptake, need strong structural support, and with a relatively short window between “ready to harvest” and “overgrown and seedy.” Save them for after you have a working system you trust.
Microgreens are worth mentioning as a parallel track. They grow in soil trays rather than a hydroponic system, complete in 7–14 days, and teach you about seedling health, moisture management, and harvest timing without requiring any reservoir management. If you are waiting on parts or want to practice before your Kratky setup is ready, microgreens are a genuinely useful starting point.
Making the Decision
Most people reading this guide should build a Kratky system first. The cost is low, the failure modes are slow and fixable, and the skills you learn, mixing nutrient solution, managing pH, and reading plant health, transfer directly to every other system type. When you have harvested two or three Kratky crops and want faster growth or the ability to grow tomatoes, DWC is the right upgrade. The Kratky method guide has the complete step-by-step build, growing medium options, and a crop guide with EC targets.
If you already have experience with other nutrient systems, understand pH management, and specifically want to grow fruiting crops, start with DWC. The Deep Water Culture guide covers the single-bucket build and how to scale to multi-bucket RDWC once you understand the base system.
Either way: start growing sooner rather than waiting for the perfect setup. The gaps in your knowledge after a first grow are much more specific and addressable than the gaps before one. A mason jar, a net pot, some nutrients, and a bag of clay pebbles is enough to learn more about hydroponic plant nutrition in 35 days than reading guides for six months.
The hardware is secondary. The grow is the point.
[ FAQ ]
Is hydroponics harder than soil gardening for beginners?
For leafy greens and herbs, hydroponics is actually more forgiving than soil in some ways: you control the exact nutrient concentration and pH, so you eliminate a whole category of soil-related problems (compaction, drainage, pests, inconsistent fertility). The learning curve is mainly about pH and EC (electrical conductivity) measurement, which takes one or two grows to get comfortable with. A Kratky setup with lettuce is genuinely easier than a soil container garden once you understand the basics.
How much does it cost to start a hydroponic system as a beginner?
A complete beginner Kratky setup (container, net pots, clay pebbles, nutrients, pH meter, and a basic grow light) costs $50–100. If you already own a grow light or are growing near a sunny window, you can get started for $30–50. The main cost drivers are the pH meter ($20–35 for a reliable digital unit) and the grow light ($20–40 for a T5 or LED bar). Nutrients are a one-time purchase that lasts for many grows at beginner volumes.
Which hydroponic system grows the fastest?
DWC (Deep Water Culture) grows plants 15–25% faster than passive systems like Kratky because continuous aeration keeps dissolved oxygen high, which drives faster root metabolism and nutrient uptake. NFT can match DWC growth speeds in ideal conditions, but its failure risk makes it a poor choice for beginners. For a first grow, Kratky's speed (28–35 days for lettuce) is fast enough that the difference is not meaningful until you want to scale production.
Do I need a grow tent for a beginner hydroponic setup?
No. A grow tent is useful for controlling light cycles and reflecting light efficiently, but it is not required for a first Kratky or DWC setup. A shelf near a sunny window works for low-light herbs, and a T5 or LED bar light suspended above the reservoir handles everything else. A grow tent becomes worthwhile once you are growing fruiting crops that need precise light schedules, or when you want to isolate the humidity from a larger system.
Can I start a hydroponic system in an apartment?
Yes, and this is exactly what hydroponics is designed for. A single Kratky container on a countertop or shelf, with a small LED bar above it, takes up roughly the footprint of a shoebox and produces consistent herbs and salad greens year-round. I built my first Kratky lettuce setup in a Brooklyn apartment with no outdoor space: a mason jar, a net pot, some nutrients, and a cheap grow light from Amazon. The total footprint was about six inches square.