How to Grow Microgreens Step by Step (Seed to Harvest)
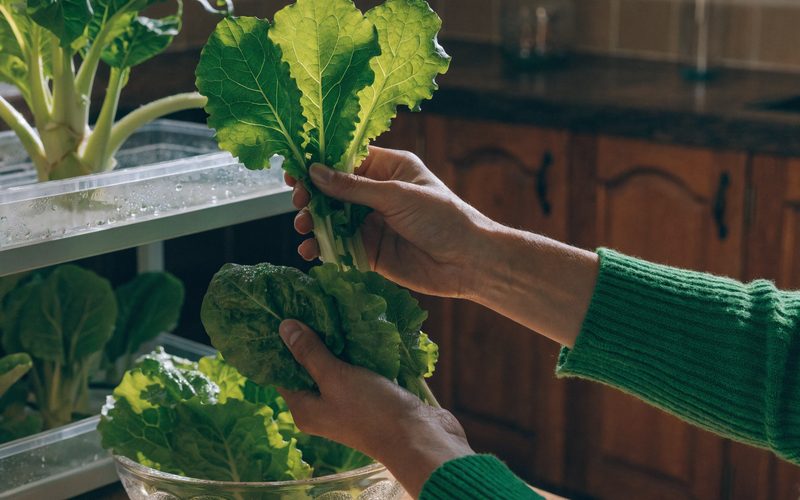
Microgreens are the fastest food you can grow. Seed to edible harvest in 7–14 days, depending on variety. No garden. No deep knowledge base. No special equipment: a tray, some seeds, and either a sunny window or a $25 grow light is the complete setup.
I grew my first tray of radish microgreens on a Brooklyn apartment windowsill with $4 worth of seeds and a plastic container I already had. That was three years and a few hundred trays ago. This guide covers everything I have learned since: the exact steps, the common failure modes, and the specific numbers that make the difference between a dense, flavorful harvest and a moldy, leggy disappointment.
If you want to understand why microgreens are such a good first project, faster feedback loops than any other crop, real food value in a tiny footprint, read the why microgreens are perfect for beginners overview first. Otherwise, let’s get into the build.
What You Need
The entry cost for microgreens is low enough that there is no reason to improvise around it. Here is everything you need for a complete first setup:
| Item | What to Buy | Cost |
|---|---|---|
| Growing tray (bottom) | Standard 1020 flat tray (no holes) | $2–$3 |
| Growing tray (top/cover) | Second 1020 flat tray (no holes) | $2–$3 |
| Growing medium | Organic potting mix or coco coir | $5–$10 per bag (many grows) |
| Seeds | Radish, pea, or sunflower (see below) | $5–$8 per ounce |
| Light source | T5 fluorescent or LED bar OR sunny windowsill | $20–$30, or free |
| Spray bottle | Any kitchen spray bottle | $3–$5 |
| Weight for germination | A full water bottle, brick, or book | Already own it |
Total for a first grow: $10–$25, depending on whether you already have a light. You will get many future grows out of the seeds and growing medium.
The tray setup deserves a note: you need two trays. The bottom tray holds your growing medium and seeds. The second tray inverts on top as a cover during germination (the blackout period). The weight you set on top of the cover creates pressure that forces seeds into the medium for even contact and drives stem straightness. Do not skip this. It makes a measurable difference.
Step 1: Choose Your Seeds
For a first grow, pick one of these three. They are forgiving, fast, and widely available.
Radish (daikon or rambo red) is the undisputed beginner crop. Germination is aggressive, the blackout period is short (3 days), and you are harvesting in 5–7 days after uncovering. The flavor is sharp, peppery, and genuinely useful as a garnish. Seeds are dense so they require a higher sow rate per tray.
Pea shoots take longer (12–16 days total) but produce a sweet, tender green that you can use in salads whole. Pea seeds need to be soaked 8–12 hours before sowing because the seed coat is thick. The resulting germination is very uniform.
Sunflower is the showstopper: tall, robust stems with a nutty flavor that most people love. Seeds need soaking (12 hours) and a weighted cover during germination is especially important because the seed hulls stick to the cotyledons and the weight helps them shed naturally. Total time to harvest: 10–14 days.
Broccoli is worth mentioning as a fourth option. It is slower to establish than radish but produces the highest density of sulforaphane (the compound that makes microgreens nutritionally interesting). Very popular with people growing for health rather than just flavor. Time to harvest: 8–12 days.
Avoid basil for your first grow. It is slow, requires higher humidity, and has a low germination rate relative to its seed price. Save it for once you have a few trays under your belt.
Step 2: Prepare Your Tray
Fill the bottom tray with growing medium to about 1 to 1.5 inches deep. Do not overfill; you want a half inch of clearance between the top of the medium surface and the tray edge. This makes it easier to cover without crushing any sprouts later.
Level the surface. Use your hand or a flat piece of cardboard to press the medium down gently and smooth it out. Uneven surfaces create dry spots where germination fails and wet spots where mold forms.
Pre-moisten before seeding. Pour water over the medium until it is evenly damp throughout: squeeze a handful and you should see only a few drops come out, not a stream. Pre-moistening now means you do not have to water from above after seeding, which can shift seeds and cause uneven distribution.
If you are using coco coir (which comes as dry bricks), expand the brick in a bucket of water first, then squeeze out excess moisture before filling your tray. Coco holds water well but starts as completely dry compressed fiber.
Step 3: Sow Seeds
Sow seeds densely and evenly across the entire surface of the tray. Microgreens are grown at much higher density than garden vegetables; you want full coverage, with seeds touching but not stacking.
Seed rates per standard 1020 tray (approximate):
- Radish: 1–1.5 oz (28–42g)
- Pea shoots: 3–4 oz (85–113g), pea seeds are large
- Sunflower: 2–3 oz (56–85g), in-shell seeds at high density
- Broccoli: 0.5–0.75 oz (14–21g), tiny seeds, less weight but high count
For pea and sunflower: Soak seeds in room-temperature water for 8–12 hours before sowing. This softens the seed coat and dramatically accelerates germination; you will see uniform sprouting within 24 hours instead of sporadic germination over 3 days. Drain the water and rinse before spreading.
After spreading seeds, use your palm to gently press them into the growing medium surface. You want good seed-to-medium contact, not seeds sitting on top with an air gap underneath. One firm, even press across the whole tray is all it takes.
Do not water from the top after seeding. The medium is already moist. Any additional top watering moves seeds around and can drown them under pooling water. Bottom watering comes later; for now, move to the blackout setup.
Step 4: The Blackout Period
The blackout period is the single most misunderstood part of microgreens growing. It is not just about “germination in the dark.” It does three specific things:
- Darkness signals the seeds that they are underground, triggering germination
- The enclosed humid environment retains moisture evenly across all seeds
- The weight on top forces seedlings to push straight upward against resistance, producing dense, upright stems rather than floppy, sprawling growth
Setup: Invert the second tray directly on top of your seeded tray. Set a weight on top: a full 1-quart water bottle works, a brick works, a stack of books works. For sunflower, use heavier weight (2+ lbs) because sunflower seedlings are strong enough to lift a light cover, and the weight is what removes those stubborn seed hulls.
Duration: 3–4 days for most varieties. Radish is ready to uncover at 3 days. Sunflower and pea benefit from a full 4 days. Check by lifting the corner of the cover: you want to see dense, pale sprouts that are 1–2 inches tall and have not yet reached the cover. If any sprouts are pressing against the top tray, uncover immediately regardless of the day count.
You do not need to water during the blackout period if you pre-moistened your medium correctly. The enclosed environment retains moisture. If you are worried, you can briefly lift the cover after 48 hours and mist lightly if the medium surface looks dry, but in practice this is rarely needed.
A few things that can go wrong during blackout: if your room is above 75°F, germination may be aggressive and mold can start on seeds that are not yet sprouted. At higher temperatures, reduce blackout duration to 2–3 days and increase airflow after uncovering. If you see no germination after 4 days, your seeds may be old or the medium may have dried out. Add light moisture (mist from the side, not from the top) and give it another 24 hours.
Step 5: Uncover and Add Light
After 3–4 days, remove the weight and the cover tray. You should find a dense mat of pale, cream-colored sprouts. This is normal; color develops only under light. The pale, etiolated growth is not a failure; it means the blackout worked.
Move the tray to your light source immediately.
Grow light: Hang a T5 fluorescent or LED grow bar 2–4 inches above the tray canopy. Run it 12–16 hours per day on a timer. At this distance and duration, most varieties will green up within 6–12 hours as chlorophyll develops.
Windowsill: Place in the brightest south-facing window you have. Rotate the tray 180 degrees daily to prevent persistent stem lean toward the light. Growth will be slightly slower and the stems may be less uniform than under artificial light, but the crop will be entirely viable.
The light period lasts until harvest, typically 3–7 more days depending on variety. During this period you are mainly maintaining moisture and watching for the harvest window.
Step 6: Watering During Growth
Bottom watering is the method that separates successful microgreens growers from frustrated ones who keep fighting mold. Here is why it works: top watering splashes water onto stems and leaves, creating the humid, wet surface conditions where mold thrives. Bottom watering delivers moisture to the root zone and lets the surface stay drier.
Bottom watering technique:
- Pour about half an inch of water into a clean, empty tray (or a baking dish large enough to hold your 1020 tray)
- Set your growing tray inside it
- Wait 10–15 minutes for the medium to absorb water upward through capillary action
- Lift the tray and check that the medium is evenly damp but not saturated: it should feel like a wrung-out sponge
- Remove from the water source; let any excess drain
Watering frequency: Once per day during active growth, usually in the morning. In very dry environments (heated apartments in winter), you may need twice daily. Check by pressing a finger into the medium: if it comes up with medium stuck to it, moisture is fine; if it comes up dry, water.
Signs of overwatering: Medium stays wet and does not dry out between waterings, surface begins to look shiny or slimy, mold appears at the base of stems. If this happens, reduce watering frequency and improve airflow with a small fan.
Signs of underwatering: Medium surface is dry and pulling away from tray edges, stems begin to wilt in the afternoon, tips look dry. Microgreens recover quickly from underwatering; a bottom-water session usually revives them within an hour.
If you see white, fuzzy growth at the base of your stems: take a close look. Fine white root hairs on the stems themselves are normal; these are aerial root structures and not mold. True mold appears on the medium surface, is grayish or greenish (not white), has a musty smell, and spreads across large patches. If you have true mold, increase airflow, reduce watering, and for future grows move to a sterile medium like coco or a hemp grow mat.
Step 7: When and How to Harvest
The harvest window for microgreens is the cotyledon stage: the first set of leaves are fully open and standing upright. These are the seed leaves, the embryonic leaves that were packed inside the seed. They are round or oval for most varieties, not shaped like the adult plant’s leaves.
For radish this happens around day 5–7 after uncovering (day 8–11 total). For sunflower, day 7–10 after uncovering. You are not waiting for the true leaves (the second set, shaped like adult leaves) to form; that is past peak flavor and nutrition.
Visual cues that you are in the harvest window:
- Cotyledons are fully expanded and horizontal
- Stems are firm and upright, not floppy
- First true leaves are either not yet visible or just barely emerging as a small bump at the center of the cotyledons
- Color is fully green (or the variety color; radish often has purple-tinted stems)
Harvest method:
- Gather a small bunch of stems together loosely with one hand
- Cut horizontally with sharp kitchen scissors, 1/2 to 1 inch above the growing medium surface
- Work across the tray in sections, cutting just above the medium
- Do not cut into the medium; you are cutting stems, not pulling roots
Washing and storage: Rinse the harvest gently under cold water, shake dry, and spread on a clean towel for a few minutes. For best shelf life, do not wash until just before eating; store dry in a sealed container or zip-lock bag in the refrigerator. Shelf life is 5–7 days for most varieties.
Yield: A standard 1020 tray typically produces 6–10 oz (170–280g) of finished microgreens depending on variety. Sunflower yields more; broccoli yields less. At typical retail prices of $5–$8 per oz, each tray represents $30–$80 of produce value.
Variety Timing Reference
The numbers below are from actual grows in a climate-controlled indoor environment (68–72°F) under a T5 grow bar at 16 hours per day. Windowsill grows or cooler rooms will run 1–3 days slower.
| Variety | Soak Seeds? | Blackout | Uncover to Harvest | Total Days | Notes |
|---|---|---|---|---|---|
| Radish (daikon) | No | 3 days | 4–5 days | 7–8 days | Fastest starter; peppery flavor |
| Radish (rambo red) | No | 3 days | 5–6 days | 8–9 days | Purple stems; slightly slower than daikon |
| Broccoli | No | 3–4 days | 5–8 days | 8–12 days | Slow to unify; high sulforaphane content |
| Sunflower | Yes (12 hrs) | 4 days | 6–10 days | 10–14 days | Needs heavy weight; nutty, satisfying flavor |
| Pea shoots | Yes (8–12 hrs) | 4 days | 8–12 days | 12–16 days | Sweet and tender; harvest before curling |
| Arugula | No | 3 days | 5–7 days | 8–10 days | Spicy; seeds are tiny, use low sow rate |
| Basil | No | 4–5 days | 10–14 days | 14–19 days | Slow; humidity-sensitive; not for beginners |
| Kale | No | 3–4 days | 5–7 days | 8–11 days | Mild; good paired with radish in same harvest |
| Mustard | No | 3 days | 4–5 days | 7–8 days | Very spicy; small seeds, low sow rate |
Start with radish. On your second grow, add one more variety alongside it. By your third grow, you will know your preferred timing, sow rate, and watering cadence well enough to run two or three trays on a stagger.
Common Problems and Fixes
Mold on medium surface What it looks like: Grayish or greenish fuzzy patches, usually starting at the edges or near damaged seeds. Musty smell. Cause: Overwatering, insufficient airflow, contaminated seed lot, or poor drainage. Fix: Add a small fan aimed at the tray (indirect airflow, not directly blasting the greens). Switch to bottom watering only. For future grows, switch to a sterile medium like coco coir or a hemp mat, and rinse seeds before sowing to remove surface microbes.
Leggy, pale stems that fall over What it looks like: Stems are 3–4 inches tall but thin and floppy; color is light green or yellow. Cause: Insufficient light after uncovering, blackout ended too late, or no weight during germination. Fix: Move the light closer (2–4 inches) or increase daily duration to 16 hours. For future grows, maintain weight during the blackout period and uncover as soon as sprouts reach 1–2 inches.
Damping off (stems pinching and collapsing at the base) What it looks like: The stem looks healthy for the first inch or two, then has a brown, water-soaked pinch right at the soil line. Plants fall over. Cause: A fungal pathogen (usually Pythium or Rhizoctonia) thriving in wet, warm, stagnant conditions. Common with top watering. Fix: Switch to bottom watering, reduce temperature below 72°F, increase airflow. Once damping off starts in a tray it spreads quickly; harvest anything that looks healthy immediately and compost the rest. Start fresh with sterilized medium.
Poor germination (sparse or patchy sprouts) What it looks like: After 3–4 days of blackout, fewer than half the seeds have sprouted. Patchy coverage across the tray. Cause: Old seeds (test germination rate by placing 10 seeds on a damp paper towel), medium too dry during blackout, or seeds not pressed into medium. Fix: For this tray, give it another 24–48 hours with added moisture (mist gently and re-cover). For future grows: press seeds firmly into medium after sowing, check seed age (most microgreens seeds are viable for 2–3 years stored cool and dry).
Seed hulls stuck on cotyledons What it looks like: The seed shell stays attached to one or both cotyledon leaves, preventing them from opening. Common with sunflower. Cause: Insufficient weight during germination, not soaking seeds, or low humidity under the cover. Fix: Mist the tops of the sprouts once, then gently brush the hulls off with a soft toothbrush or your fingertip. For future grows, increase the cover weight for sunflower, soak for a full 12 hours, and ensure the cover fits tightly to maintain humidity.
Uneven growth across the tray What it looks like: Dense, tall growth in the center; sparse, shorter growth at the edges. Cause: Uneven sowing, medium not leveled, or light intensity falling off at tray edges. Fix: Pre-moisten medium more thoroughly, level carefully before seeding, and redistribute seeds actively during sowing to push more to the edges. For lighting, ensure the grow bar fully spans the tray width.
What Comes Next
Once you have grown two or three trays successfully, the natural next step is either scaling up (more trays, more varieties, a dedicated rack) or experimenting with soil-free growing. A multi-tier shelf with a single grow light lets you run 6–12 trays in a small footprint; the economics get significantly more interesting at that scale.
If the broader world of food growing without soil interests you, the best hydroponic system for beginners breaks down every system type with honest cost and complexity comparisons. Kratky is the natural first step for someone who wants to go beyond microgreens into leafy greens and herbs.
For those ready to go deeper, once you’re comfortable with microgreens, hydroponics opens up to fruiting crops that are genuinely difficult to grow any other way indoors. Tomatoes in a deep water culture system on a 4×4 shelf are not as wild as they sound.
The first tray is the hardest one. After that, the process is simple enough that it mostly runs itself; you just show up to water and harvest.
[ FAQ ]
Do I need soil to grow microgreens?
No. Microgreens grow well in plain potting mix, coco coir, hemp grow mats, or jute mats. Soil-free options are easier to keep clean and reduce mold risk. If you use coco coir, add a small amount of water-soluble fertilizer after the blackout period ends, since coco is inert and provides no nutrients. For a first grow, a simple potting mix (not seed-starting mix, which is too fine) works perfectly and is available anywhere.
How do I know when microgreens are ready to harvest?
Harvest when the first set of leaves, the cotyledons, are fully open and standing upright. For most varieties this is 7–14 days after sowing. You are harvesting before the true leaves (the second set, which look like the adult plant) appear. At this stage the stems are firm, the flavor is at its peak, and the greens store well in the fridge for 5–7 days. If you wait until true leaves form, the greens get more fibrous and the flavor mellows.
Why are my microgreens growing leggy and pale?
Leggy, pale microgreens are almost always a light problem. Either the light is too far away, too weak, or you left the blackout cover on too long. After the blackout period ends, move the tray within 2–4 inches of a T5 or LED grow bar, or to the brightest south-facing window you have. Microgreens need 12–16 hours of light during the growth phase. A windowsill that gets 4–6 hours of direct sun can work but expect slightly slower growth and stems that lean toward the light; rotate the tray daily to compensate.
Can I regrow microgreens after cutting?
No. Microgreens are a single-harvest crop. Unlike lettuce (which you can cut and the plant regrows from the crown), microgreens are harvested by cutting the stem just above the growing medium. Once cut, the plant cannot regenerate; there are no stored sugars in the root system to power regrowth. Compost the spent medium and roots, rinse your tray, and start the next batch. With a little practice, you can stagger two or three trays so you are harvesting continuously every few days.
Do microgreens need a grow light or will a window work?
A window works, but a grow light is better. A south-facing window with 6+ hours of direct sun is enough to grow healthy microgreens; you will just see some stem lean toward the light and slightly slower growth compared to artificial lighting. A basic T5 fluorescent or LED grow bar ($20–$30) hung 2–4 inches above the tray gives 12–16 consistent hours and produces straighter, denser growth. If you are growing more than one tray at a time or your windows are limited, a grow light is worth it.
Related Articles
Why Microgreens Are the Perfect First Crop for Beginners
Microgreens are the fastest, cheapest crop you can grow: no garden, no experience, under $15 to start. Here is why beginners should start here.